Modern web applications increasingly demand real-time features, whether it’s for live chat, notifications, or collaborative editing. Action Cable, a powerful tool integrated into the Ruby on Rails framework, is designed to meet these needs by harnessing the capabilities of WebSockets.
What Are WebSockets?
Before diving into Action Cable, we need to understand the underlying technology that makes it possible: WebSockets.
In the ever-evolving landscape of web technologies, WebSockets have emerged as a powerful tool for enabling real-time communication between clients and servers. Unlike the traditional HTTP request-response model, where the client must continuously poll the server for updates, WebSockets provide a full-duplex communication channel that remains open, allowing for instantaneous data exchange.
WebSockets operate over a single, long-lived connection. Once established, this connection allows the server to push updates to the client as soon as they occur, eliminating the latency associated with frequent polling. This makes WebSockets particularly well-suited for applications that require real-time interaction, such as chat applications, live sports updates, online gaming, and collaborative editing tools.
The WebSocket protocol is an extension of HTTP, beginning its life as an HTTP handshake before upgrading to a persistent connection. This efficiency in communication reduces overhead, enhances performance, and ensures a more seamless user experience.
How Action Cable Leverages WebSockets
Building on the WebSocket protocol, Action Cable simplifies the process of adding real-time features to your Rails application. It provides a seamless way to integrate WebSockets with the rest of your Rails application, it does so by managing connections, broadcasting messages, and ensuring that all real-time communication needs are handled efficiently.
Action Cable abstracts much of the complexity involved in managing WebSocket connections, making it easier for developers to implement features like live notifications, chatrooms, and real-time updates with minimal code. By integrating tightly with the Rails framework, it leverages Rails conventions and structures, allowing you to build powerful real-time applications without learning entirely new paradigms.
Let's now see how we can harness Action Cable’s potential with a very simple example: a Chat Room.
Architecture
The solution that we are studying follows a simple server-client configuration. The server is responsible for authenticating, initializing connections and redistributing the received messages to the clients. The clients will be responsible for requesting the connection and sending and receiving messages to and from the server. The figure underneath illustrates the use case here:
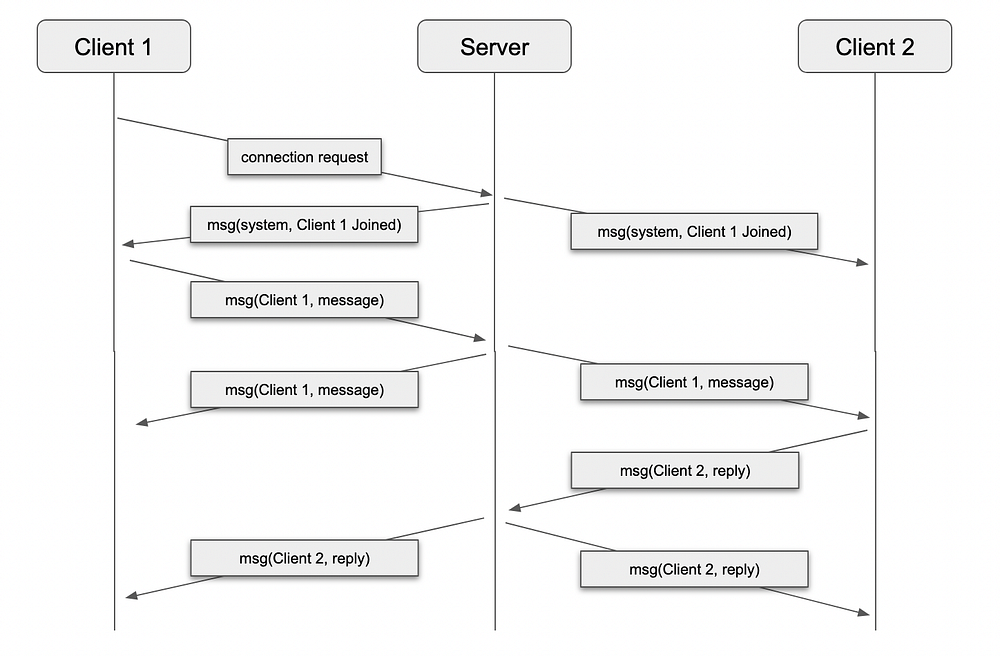
In the above schematic, there three entities:
- Server: Listening to messages and connection requests.
- Client 1: Starting without an established connection to the server
- Client 2: Starting with an established connection to the server
As observed before, when the Client 1 connection request is successful, the server communicates to everyone, including Client 1, that Client 1 has joined the chat. Afterwards, Client 1 can send a message, that will be redistributed to all clients including themselves (both Client 1 and Client 2 receive the same message). The same happens when Client 2 sends a message. No client will have access to the messages sent before connecting.
With this idea in mind, we can now proceed implementing the system.
Implementation
We start with a clean API Ruby on Rails installation by creating a new channel. We do that by running the following rails generation command:
rails g channel chatThis will generate the following files:
create  app/channels/chat_channel.rb
create  app/channels/application_cable/channel.rb
create  app/channels/application_cable/connection.rb
Let's start by considering the connection.rb file. If we open it, it only has the class definition:
module ApplicationCable
  class Connection < ActionCable::Connection::Base
  end
end
This object represents the connection object created every time we open a new WebSocket on the server. From each connection, we can create new channel subscriptions with its information as a baseline. We authenticate and authorize in this class.
The Action Cable documentation provides us with an example of how we can do that, assuming that we’re already using an authentication service on our application.
Hovever, since this is outside the scope of this article, we’ll leave our connection file just as it is.
Next, we have the channel files. A channel is similar to a controller in the typical model-view-controller (MVC) setup, doing all the work when we send or receive data. Each consumer will subscribe to one or more channels (a.k.a a subscription) and be able to read from or write to that channel.
First, we have the channel.rb file. This one would be used as the parent class for all the channels we create. Any common logic to all the channels that we’ve created goes here. Currently, it’s empty:
module ApplicationCable
  class Channel < ActionCable::Channel::Base
  end
end
Next, we have the chat_channel.rb, where we will be implementing the logic for said channel. As of now, the file is empty:
class ChatChannel < ApplicationCable::Channel
end
However, we won’t let it stay that way for long. First, we need to be able to receive subscriptions. We do that by overriding the method subscribed in our ChatChannel class:
class ChatChannel < ApplicationCable::Channel
  # this is called when the consumer becomes a subscriber to this channel
  def subscribed
    stream_from "chat_#{params[:room]}"
    message = { from: "system", message: "#{params[:username]} joined!" }
    ActionCable.server.broadcast("chat_#{params[:room]}", message)
  end
end
So what is happening here? We use the stream_from method to start streaming from a queue, named after a room passed through the subscription parameters. This also subscribes the consumer to said queue. We then reply by broadcasting a message to all the consumers subscribed to that queue, letting everyone know that someone has joined our chat channel.
Another important aspect of being in a chat room like this is allowing everyone to receive sent messages. As such, we need to broadcast back the messages that our clients send. We do that by overriding the method receive:
class ChatChannel < ApplicationCable::Channel
  # ... previous stuff ...

  def receive(message)
    ActionCable.server.broadcast("chat_#{params[:room]}", message)
  end
end
The method receive has a single parameter with the message that was received. This allows us to pick the message that the subscriber sent and rebroadcast it to everyone else, just as we sent the welcome message on the subscribed method.
This completes the essential part of our backend server. So, what about the front end?
React Front End
Starting with a clean React project, we start by adding the Action Cable package:
npx install @rails/actioncableThis installs the package that we need to interact with Action Cable from React.
From here, we’ll be adding a new file, src/cable.js to create our consumer instance:
// src/cable.js
import { createConsumer } from '@rails/actioncable';

const URL = 'ws://localhost:3000/cable';
const consumer = createConsumer(URL);

export default consumer;
This gives us a consumer instance that we can use in our chat room.
To use a secure websocket connection use wss:// instead of ws:// on the URL protocol.
We will now start with a very simple UI, described by the following functional component:
import React, { useState } from 'react'
import consumer from './cable'

const ChatRoom = () => {
  const [usernameField, setUsernameField] = useState('')
  const [messageField, setMessageField] = useState('')
  const [username, setUsername] = useState(null)
  const [channel, setChannel] = useState(null)
  const [messages, setMessages] = useState([])

  const login = () => {
    // ... connection logic goes here
    setUsername(usernameField)
  }

  const receiveMessage = (data) =>
    setMessages((previous) => [data, ...previous])

  const submitMessage = () => {
    if (messageField === '') return;
    // ... sending message logic goes here
    setMessageField('')
  }

  if (username) {
    return (
      <div>
        <div>
          <span>message ({username}): </span>
          <input name="message" value={messageField} onChange={(e) => setMessageField(e.target.value)} />
          <button type="submit" onClick={submitMessage}>Send</button>
        </div>

        <div>
          {messages.map(({ from, message }, index ) => (
            <p key={index}>
              <span style={{ fontWeight: 'bold' }}>{from}: </span>
              {message}
            </p>
          ))}
        </div>
      </div>
    )
  }

  return(
    <div>
      <span>username: </span>
      <input name="username" value={usernameField} onChange={(e) => setUsernameField(e.target.value)} />
      <button type="submit" onClick={login}>Log in</button>
    </div>
  )
}

export default ChatRoom
This makes a very basic UI:

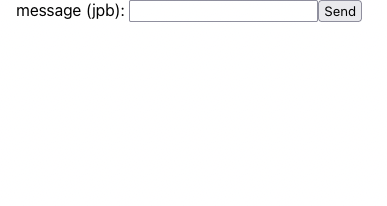
However, this is enough to demonstrate our use case here. First, we start by subscribing to our channel. We can do that inside the login function:
  const login = () => {
    const channel = consumer.subscriptions.create({
      channel: 'ChatChannel',
      room: 'room',
      username: usernameField,
    }, {
      connected: () => console.log('connected'),
      disconnected: () => console.log('disconnected'),
      received: (data) => receiveMessage(data),
    })

    setChannel(channel)
    setUsername(usernameField)
  }
We can see new content in this function that wasn’t there before. We are picking the consumer we created previously, and using it to create a new subscription. As parameters, we pass two objects: the first object contains the necessary parameters to establish the connection to the back end we created previously: the channel name, a room name and the current user username.
The current front-end implementation doesn’t support different rooms for our chat, but it could easily be added, by adding components that allow us to change that parameter.
The second object contains a set of callbacks that allows the consumer to interact with our component. Of those callbacks, the more relevant one is the received callback. This gives our component the messages that were sent by the server through our websocket. As we saw previously, our receiveMessage function simply dumps the received message into an array with the messages to be rendered.
If we now run our front end and try to log in, we get the following system message:
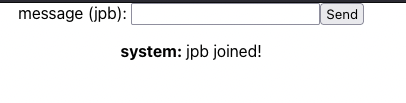
Pressing the login button creates a new subscription to a channel, and the channel-subscribed method on our back end will send us that system message.
Now we need to allow our client to send messages. We do that by adding the following to our submitMessage function:
const submitMessage = () => {
    if (messageField === '') return

    const message = { from: username, message: messageField }
    channel.send(message) // this sends the message

    setMessageField('')
  }
We pick the message that was written on the message field and the username, wrap it in a javascript object, and then send the object through the same channel we created previously. The React Action Cable library will handle the serialization to the other end by itself, so we don’t need to convert it to JSON.
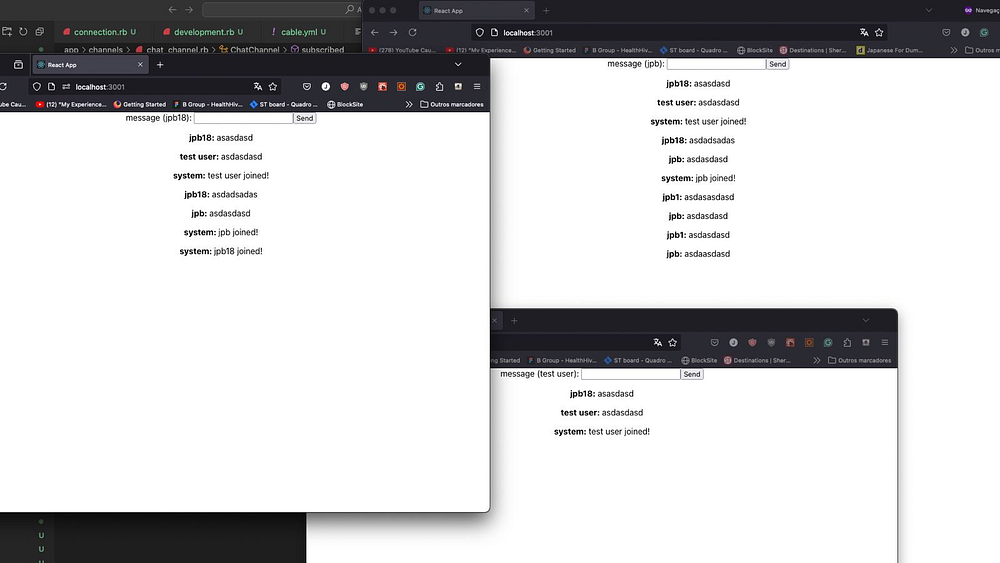
With this, we now have a fully working chat application:
You can consult the source code for this example in this GitHub repository.
What Else Can We Do With This?
The previous implementation allows us to have a basic chatroom implementation, where we have a server to handle the connections and the channels, and the clients that connect to the server to send and receive messages. However, this implementation could use some extra work:
- Authentication, using a library like Devise, allows users to log in and ensure that the identity of a username stays consistent
- Message storage in a database like PostgreSQL allows us to review old messages
- Attachment storage in a service like AWS S3, means we can send files and images to other users
- Notifications, by adding a separate channel to handle notifications
- 1-on-1 conversation, by adding another channel that handles those
- “User is writing” notifications could be done with yet another channel
Those and more could be added to this chatroom to make it a more complete application like we have with platforms like Telegram and WhatsApp.
Extra Configurations
We can continue to configure Action Cable to fit our use case. I’d like to highlight the file config/cable.yml:
# config/cable.yml
development:
  adapter: async

test:
  adapter: test

production:
  adapter: redis
  url: <%= ENV.fetch("REDIS_URL") { "redis://localhost:6379/1" } %>
  channel_prefix: action_cable_chat_server_production
This allows us to set the storage adapters that Action Cable uses. In the example above, we’re running the development build, using the Async adapter. This is a memory adapter that receives and sends messages asynchronously, not ensuring message order.
The Async adapter, however, is not adequate for running unit tests, since it doesn’t guarantee message order, and, as such, the test adapter is used. This adapter is a memory sequential adapter, so it outputs all the messages in the same order they were inserted.
Finally, we’ve our production environment, and the recommended adapter for that is the Redis adapter. When configuring that adapter we must include the Redis server address and the channel prefix as shown before.
Action Cable allows us to configure other aspects, such as:
- Allowed request sources
- Consumer configuration
- Worker pool configuration
- Client-side logging
All these points can be consulted on the Action Cable documentation.
Conclusion
Building real-time features in web applications can seem daunting, but with tools like Action Cable, the process becomes significantly more manageable. In this article, we explored the fundamentals of WebSockets and how they enable instantaneous, bidirectional communication between clients and servers. We then took a quick look at how we can make sure our application is ready for different kinds of environments.
By walking through the creation of a simple chat application, we saw how Action Cable simplifies the complexities of real-time communication, allowing us to focus on the features that matter the most. From setting up channels to broadcasting messages, Action Cable handles much of the heavy lifting, ensuring that our Rails application easily supports dynamic, real-time interactions.
As web applications continue to evolve, the demand for real-time capabilities will only grow. Whether we are building chat features, live notifications, or collaborative tools, Action Cable offers a robust, integrated solution that fits seamlessly into the Rails ecosystem. We are all now well-equipped to start adding real-time features to our own Rails projects, bringing a new level of interactivity and responsiveness to our applications.
Some sections of this article were written with the aid of OpenAI ChatGPT.