
Creating a game with a web application is not common, but some already exist on the internet. Besides the objective of creating a small game, this article also explores the possibilities and functions that the tool v0 by Vercel brings to prototyping and development. It examines how generates its code and what problems could arise from using it.
The goal is to create a web game with dynamic exploration and a gameplay loop with a consistent presentation in Next.js with code generated by an artificial intelligence (AI).
Designing the Game
It starts with scaffolding the mechanics and some of the presentation so that they can be built upon
The first prompt if to generate a landing page for the game.
Example:
Create a landing page for a website where the user can explore an island with many mysteries.
It should have a button at its center with label: "Enter if you dare"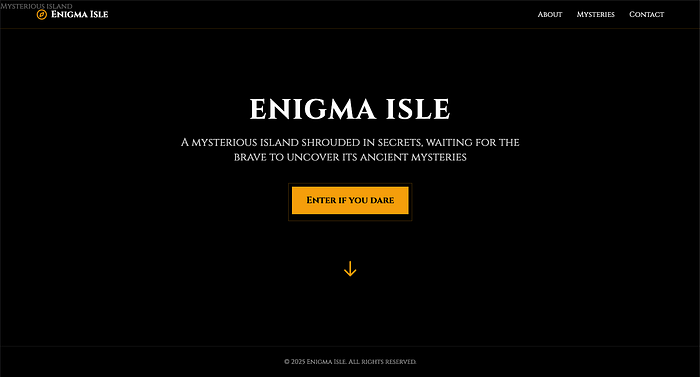
The objective is to keep the landing page simple and to have only a small hook for the user to explore on their own without much guidance.
Moving on to where that button should lead. In the case of this game, it should lead to an island map where there are various locations that can be explored.
For this effect send this prompt:
The button "Enter if you dare" should lead to a new page that displays the map of the island.
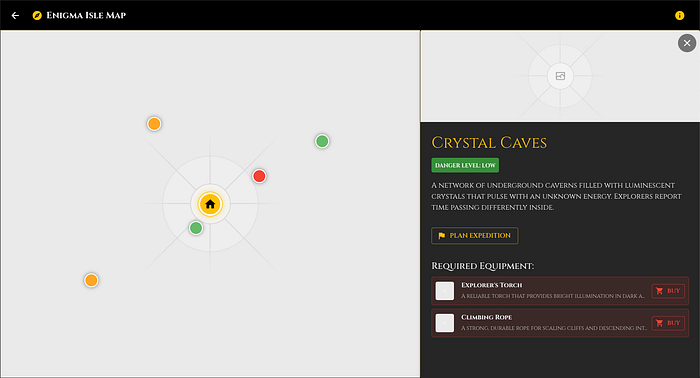
This new page should have multiple interaction points, the Locations.
These Locations on the island map can be selected to reveal a small description and a button with label "Plan expedition".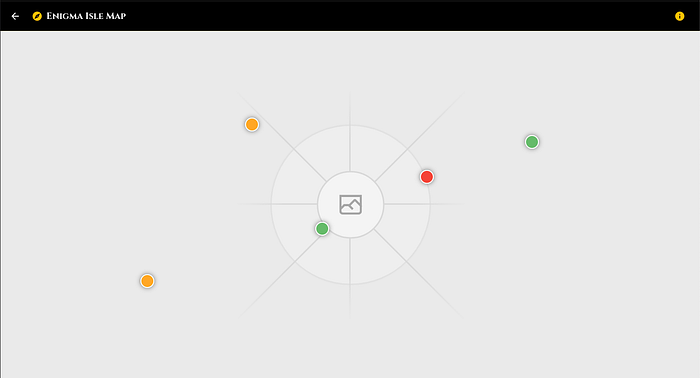
Allowing the AI to generate a random assortment of locations for the map gives a good starting point to build on top. These can be expanded individually to add more behaviors or to lock some of them behind specific requirements.
However, as shown it did not generate the map image, but this can be supplied with the prompt. This is something that can be added later because the focus now is on the mechanics and functionality. The locations are color coded. This is a mechanism that was added by AI, representing a danger level for each location.
These locations are good, but since this is an exploration game, maybe it should have a base to buy supplies and sell what is found on the expeditions to the locations. So, let’s add a main base.
On the Island map page there should exist a location that is the main base for the expeditions.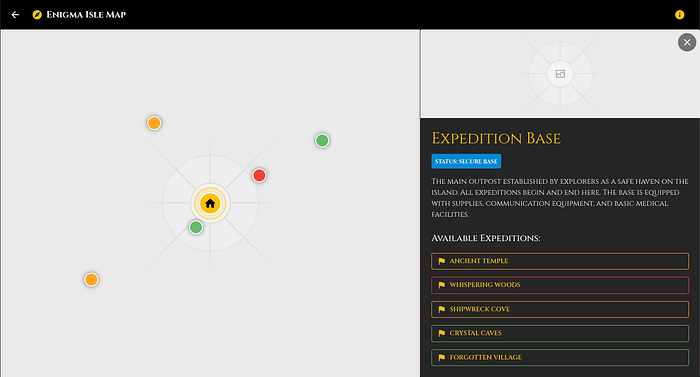
The AI generated the location and added buttons for each location, keeping the danger color code the same. This is what we wanted, but there is still no main game mechanic.
Next, we add the main mechanic for the game a loop for exploring locations and obtaining treasures. We also add a simple shop to buy supplies that can be used or are required to embark on expeditions to the available locations.
On "Expedition Base" the user can go to a page that is a store where they can buy tools and torches to be used in the expeditions.
These items should be displayed when going on an expedition.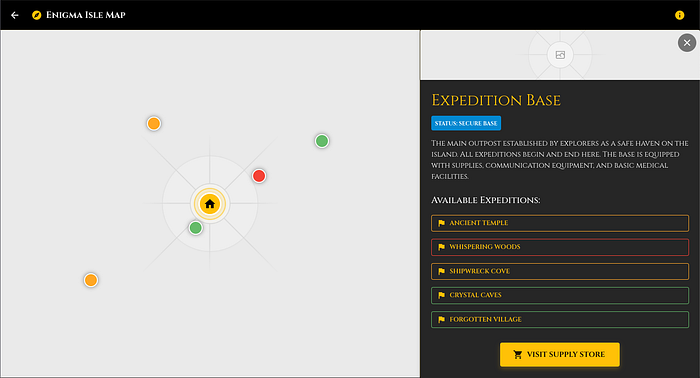
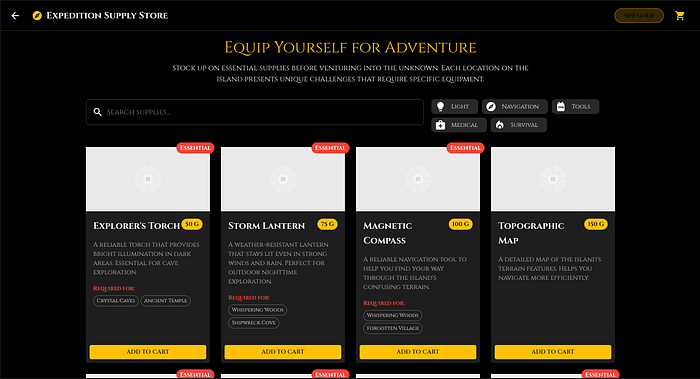
With the supplied prompt, the AI also added supply requirements for exploring a location.
A small progression path was added with this but there is still no exploration for each location that can net rewards and bring dangers while doing so. Therefore, adding this is the next step.
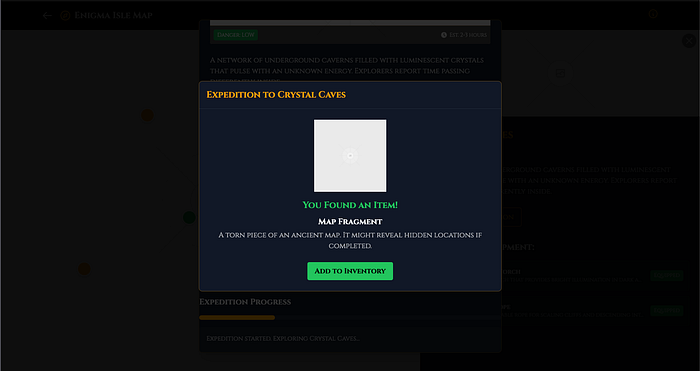
When a user goes on a expedition of a location it may find:
- Treasures. These can be sold at "Expedition Base".
- Supply Items. Items for going on expeditions.
- Monsters. They have the option to run or fend off.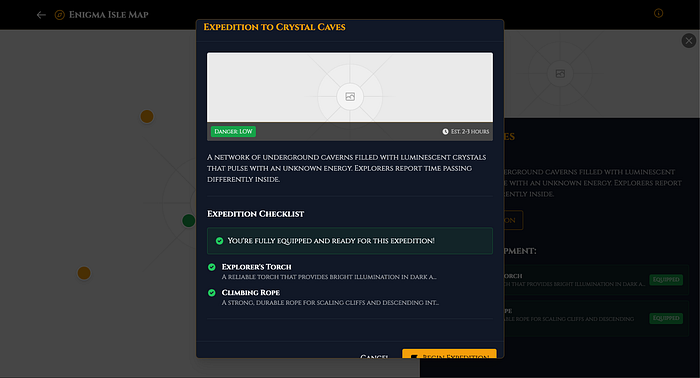
It now shows the checklist of the supplies that we have that are required to explore the location. It shows the estimated time but it does not affect the the main mechanic because nothing related to time was added to the game.
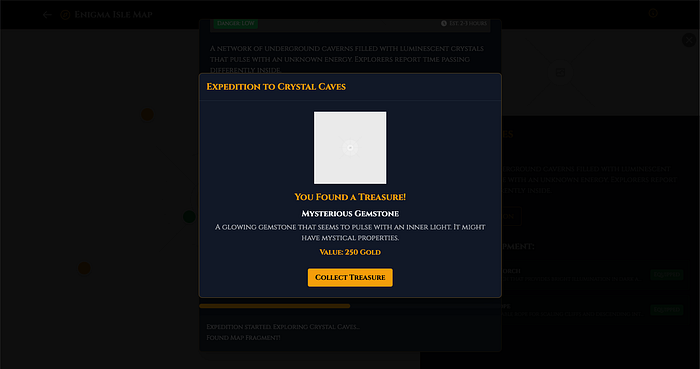
With this prompt the AI added an exploration loop to the game. The current presentation is a bit of problem.
This is because the the expedition may need to display more information in the future. So, moving it to a new page instead of being a modal seems like the better option.
Move the "Plan Expedition" Modal to a new Page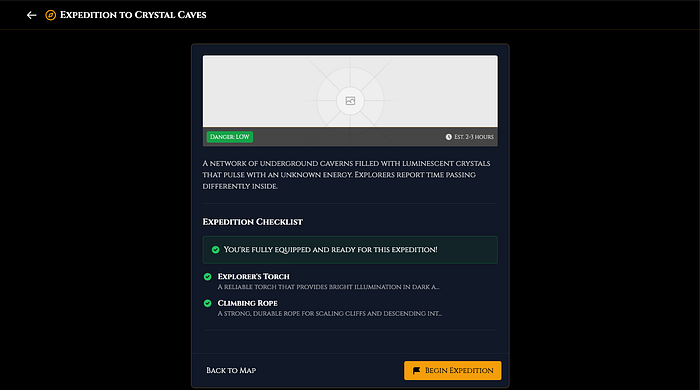
This resulted in something like this because the prompt wasn’t the best to way to express what was desired. A better prompt is:
"Plan expedition" should go to a new page instead of a modal.However, it makes more sense to work with this and write another simple prompt to adjust the page’s style to better use the screen space available.
Change the "Plan expedition" page to fit the screen but not in modal style.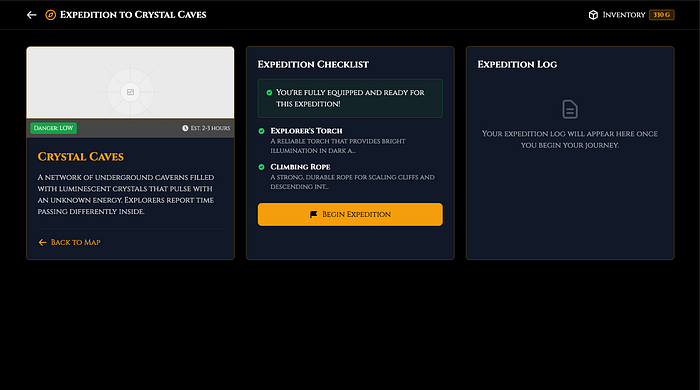
With this prompt, the modal style is removed, and the user interface(UI) is a bit more manageable, allowing expansion in the future.
Now, let’s get back to adding more game mechanics.
Another problem reared its head while testing the main mechanic. The expeditions, were ending prematurely when the system triggered an empty event where nothing is found.
This issue was solved by sending a prompt explaining the issue with what was displayed on the screen.
The expedition is ending prematurally when nothing is found and it always says in the log: "Encountered danger and had to retreat!" .This resolved the issue and was a good test to see if the AI tool could fix the issue without having to dig into the code generated and fix it by hand only by just saying the behavior that was wrong.
Let’s now take a look at adding mechanics. The expeditions are giving rewards, but nothing can be done with them, so, for now, adding a way to make money from them seems to be the best option. So lets a way to sell them.
Add to "Expedition Base" a way to sell the treasures that are found on the expeditions.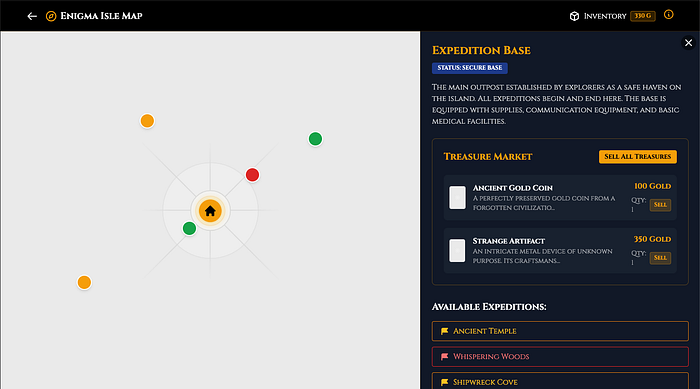
Now, the treasures can be sold. This allows us to buy more supplies for the other expeditions.
However, there are monsters and currently there are only two choices when encountering them — run or fight. Even so, it’s a roll of the dice that determines whether we win or lose.
With that, expanding the combat system is the next route. Adding monster weakness to certain types of attacks is a good option to encourage the player to make choices of what tools to bring to an expedition. In this case, let’s make the weakness that monsters can have be bludgeoning, slashing and piercing. We can also add the appropriate weapons to the supply store.
Monsters that can show up in Expeditions should have a weakness to one of these types of attacks: bludgeoning, slashing or piercing.
Weapons that inflict these types of damage can be acquired at the Store.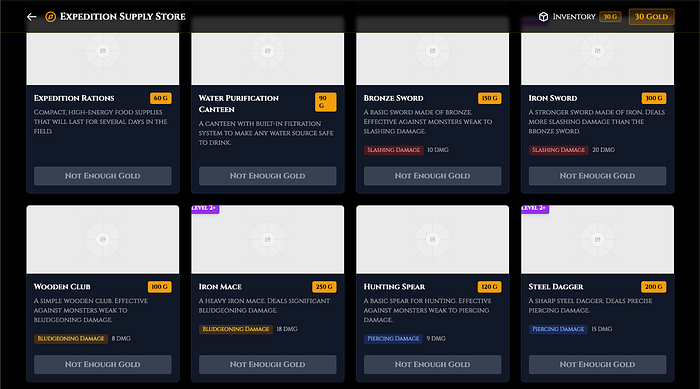
With the prompt above, the AI tool added weapons that are available at the Main Base store.
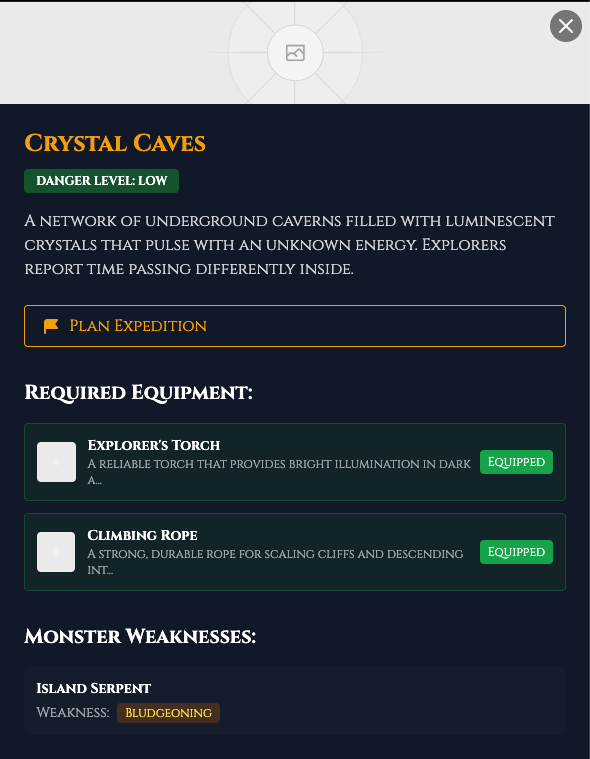
In addition, the location info shows which monster can show up and reveal its weakness.
So, now, there are decisions to be made before embarking on an expedition. For instance, “Which weapons should i bring?”. Currently, the mechanics being introduced have no balance or major interactions between them.
Looking at the balance of these mechanics allows us to see how the game should progress. For example, locking some of the locations behind a level requirement is a good way to add progression. Another way is to allow the encounters with monsters to become easier by evolving the ability to do damage. This can be done by upgrading the weapons, and this mechanic can use materials that are found on the expeditions.
Add a Level requirement to explore additional points.
Add the chance to encounter materials for weapon upgrades to the Expeditions.
Experience is gained through going on expeditions.
Bonus Experience is awarded if a monster is defeated during the expedition.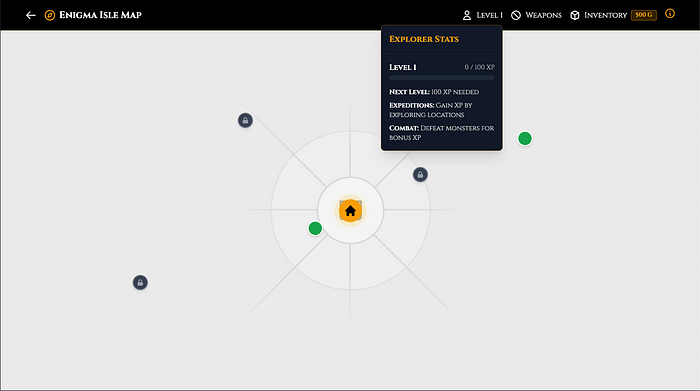
With these changes, the quantity of starting gold looks like a large amount and allows for the purchase of most of the supply items from the start. Limit the starting amount to encourage expeditions to retrieve treasures to sell and then buy more supplies to then explore other locations.
Starting Gold reserves should be limited to 300 to encourage exploration.Failing to test between these changes, another problem arose with the expedition mechanic. Now when an event is triggered, the modal shows the reward correctly, but when this is collected, it leaves the reward modal open but does not display anything. So, we tried the same approach for this issue as was done for the empty event freezing the expeditions.
After obtaining a Treasure, Material or Supply the modal showing them is not closing.
And the progress of the Expedition is stuck.
This did not solve the issue of why the modal was not closing when collecting the reward so this required a dive into the generated code to see what was causing this behavior. The issue was a variable that was not being reset properly after collecting the reward.
On app/expedetion/[locationId]/page.tsx the showEncounter is not being reset properly after an event.This prompt fixed the issue of the modal not closing and not having a way of being closed. However, this still left the issue of the progress of the expedition not concluding or progressing further.
Looking back at the code the function that was handling the collection of treasure on the encounter modal was blocking the progress.
On app/map/expedition-encounter.tsx handleCollectTreasure is not allowing the progress of the expedition.With this, the code no longer blocked the progress of the expedition. This changed the mechanic, and now the expedition ends after an event is triggered and concluded. This is a break of the expedition behavior but adding an ability to continually explore the location and increasing the rewards is a good workaround for this and it provides an incentive to keep the events rolling.
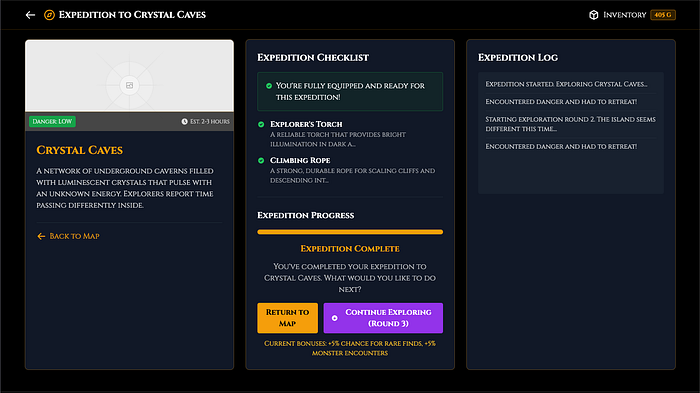
After an expedition is complete, allow the user to return to the map or to continue exploring.
If they elect to continue exploring raise the chance of enconter higher value treasure and materials by 5% and also the chance of monster encounters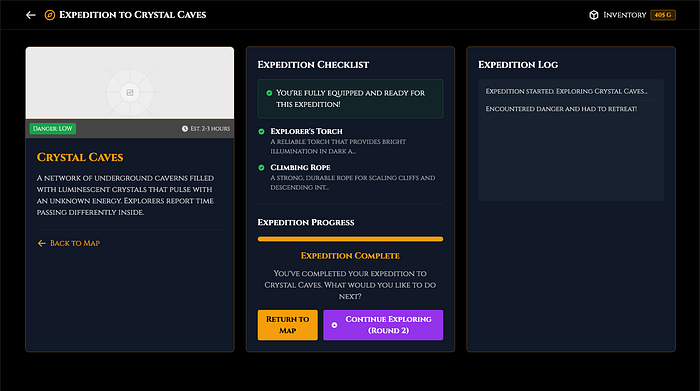
Now, most of the mechanics are implemented and seem to be working correctly and not breaking the flow of the game. Therefore, changing the perspective to make display tweaks and better functionality allows for a better user experience or quality of life(QoL).
First, let’s introduce an inventory page to allow the management of supplies, weapons, and the selling of the treasures.
Create an inventory page where we can check our treasures, weapons and supplies. This page should allow the treasures to be sold.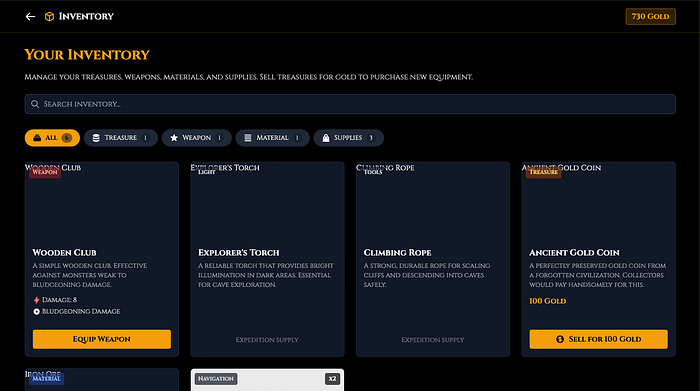
However, this display may become messy because everything is bundled together. In that case, separating them by tabs allows for a better organization.
The Inventory page separate it by tabs. Main tab is equipment, another is materials and finally treasures.
The Equipment Tab should display the supplies and have a way to select equiped weapons.
Making inventory management cleaner is a good quality of life improvement.
Another improvement that can be made is on the expedition screen. It helps to see which weapon is equipped while giving the option to change it before embarking on the expedition.
On expedition/[locationId] page add a display of the weapon that is equipped and allow this to be changed before beginning the Expedition.
This weapon selection should be a dropdown.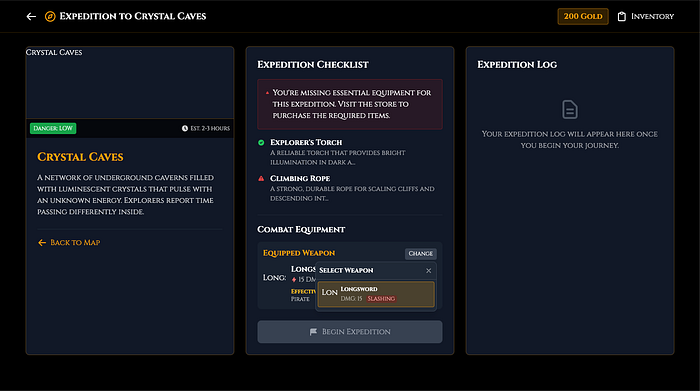
Now, the information display is better, but something is still missing if combat exists. We need to know where current health is displayed.
The player health tracking is missing. Add it to the header and on the expedition screen.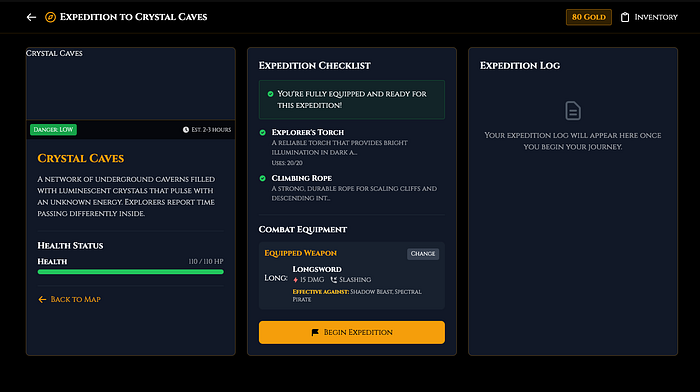
Adding this allows the information that matters to be condensed in the expedition screen, providing a better user experience and not having to navigate between screens. Consideration should be taken when creating the UI to balance the necessary functions and changes in quality of life.
Conclusion
Showing how to create an exploration game in Next.js with an AI tool is not an optimal use case. What was built here is a good base for adding functions, more pages and more complex events allowing the expansion of the mechanics.As was mentioned earlier, this is a simple start.
This use case despite being unconventional demonstrates that v0 by Vercel AI tool allows the developers to prototype an application quickly and start iterating on it quickly with a more natural conversational style. It also addresses issues without having to dig into the code being generated. Despite some of the issues in the mechanics not being solved from the get-go with a simple explanation of the problem, a simple stroll through the code and sending that information to the on the prompt allows for these problems to be corrected.
This tool, in my perspective, can be used for the creation of quick prototypes and smaller web page components that can be used separately. It helps to tweak the behavior to fit the desired objective.
At the outset of creating a game, the game is not yet balanced. Therefore, it can be improved greatly by looking at how the different mechanics are interacting with each other. For example, the supplies that can be bought have infinite use. This can be changed so they have uses and also be bought in bulk, some of them even have no function in the main game mechanic.
This is an experiment, and you may be inspired to try it out and build something better with superior visuals and improved/greater mechanics.
This tool reduces the barrier to entry to start any project. It is not a final solution, but it’s a good start.
Chat of the game